Live on YouTube with YYCam Pro (RTMP Supported / Virtual Camera)
Welcome to YYCam Pro! Whether you’re new to live streaming or a creator looking to level up your production, YYCam Pro is built to deliver a simple, stable, and professional streaming experience. This guide walks you through two easy ways to go live on YouTube: RTMP streaming or Virtual Camera.
1. Preparation
(1) Download and install YYCam Pro
- Download and install the latest version from our official website: https://yycampro.com/
- Launch YYCam Pro after installation.
(2) Confirm YouTube Live eligibility
- Make sure your YouTube account is verified and has Live Streaming enabled.
- If this is your first time going live, YouTube may require time to review/activate the feature—please prepare in advance.
2. Steps to Go Live on YouTube
Method 1: Stream directly to YouTube via RTMP
This method is best for scenarios that require higher video quality, stability, and better control—such as brand events, online classes, and sports/event streaming.
(1) Create a YouTube live stream and get RTMP info
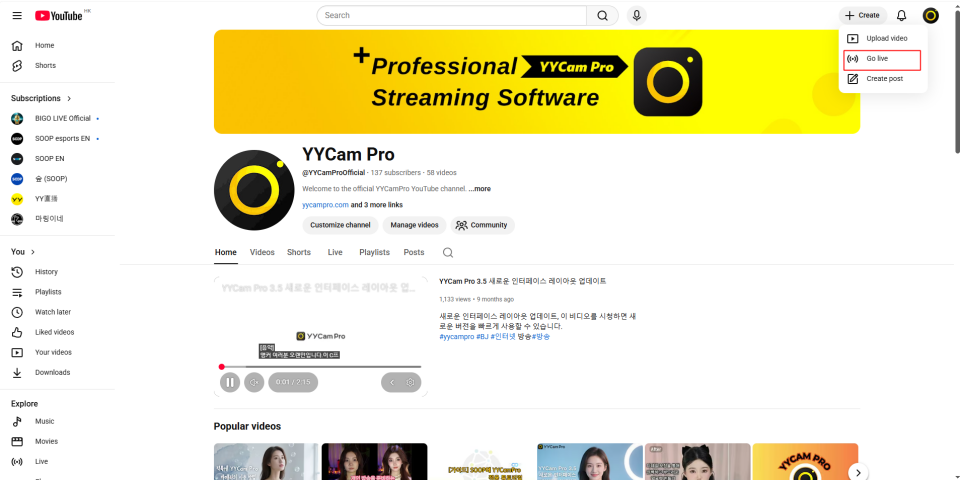
- Log in to YouTube (web), click Create (top-right) → Go live to enter the Live Control Room.
2. In the Live Control Room, select Stream, then copy the Stream URL and Stream Key.
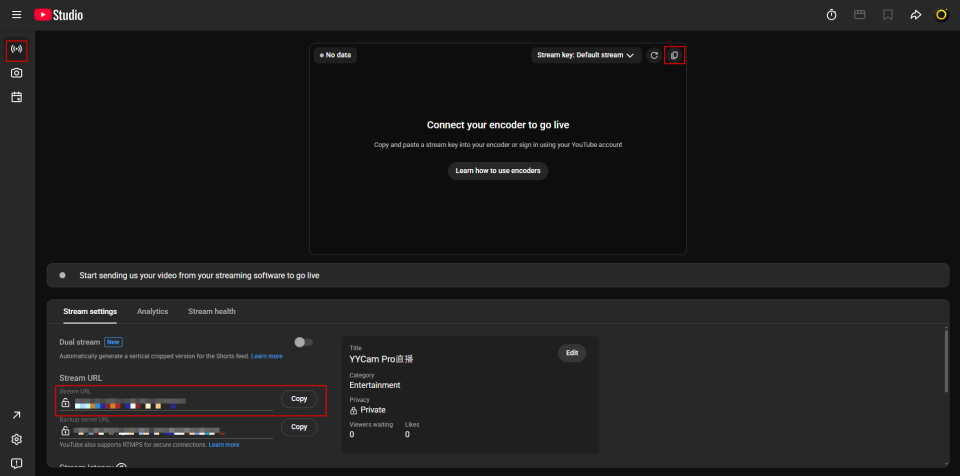
Note: The stream key is sensitive information. Do not share it. If you suspect it has been exposed, reset the key in YouTube.
(2) Configure RTMP streaming in YYCam Pro
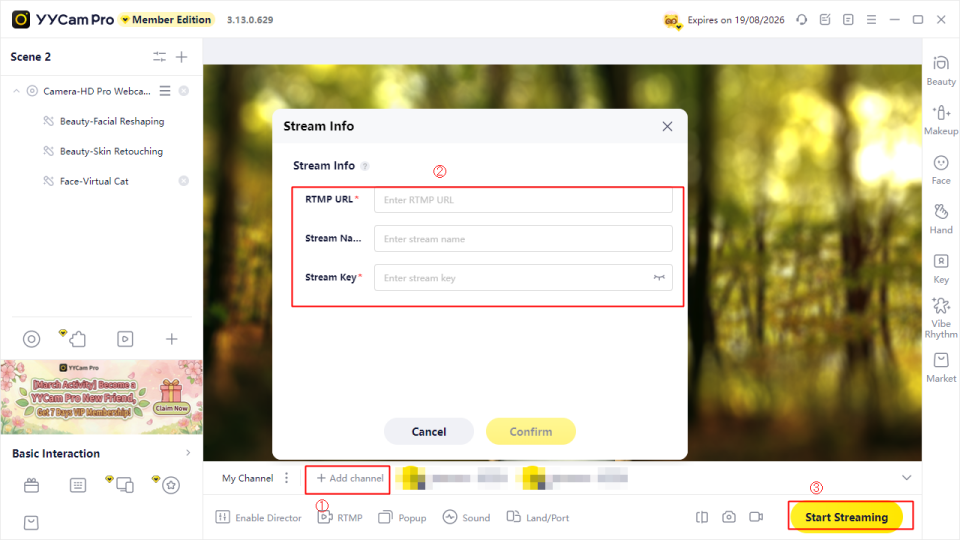
- Open YYCam Pro, click + Add Channel → Custom RTMP, and paste the Stream URL and Stream Key from YouTube.
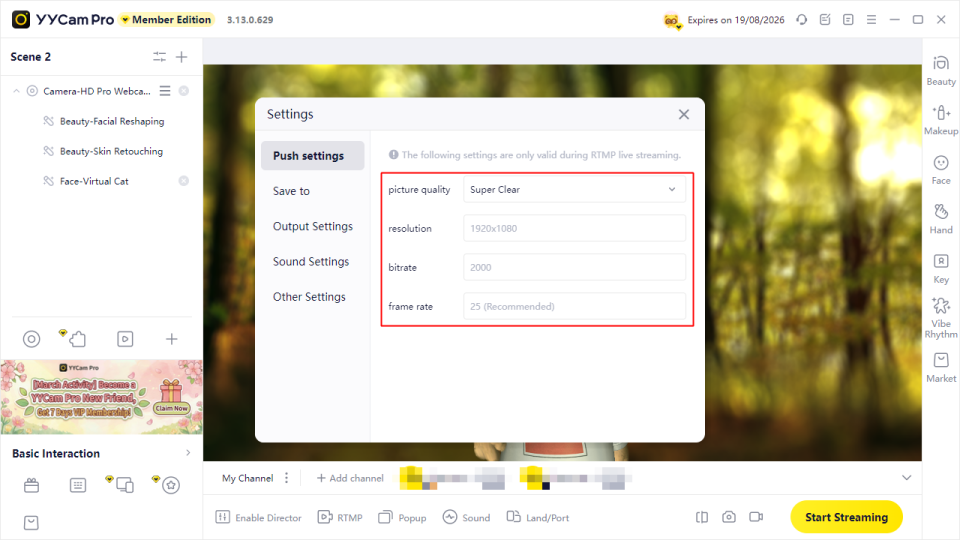
2. Choose a streaming quality preset based on your network and device performance (“Super Clear” is recommended).
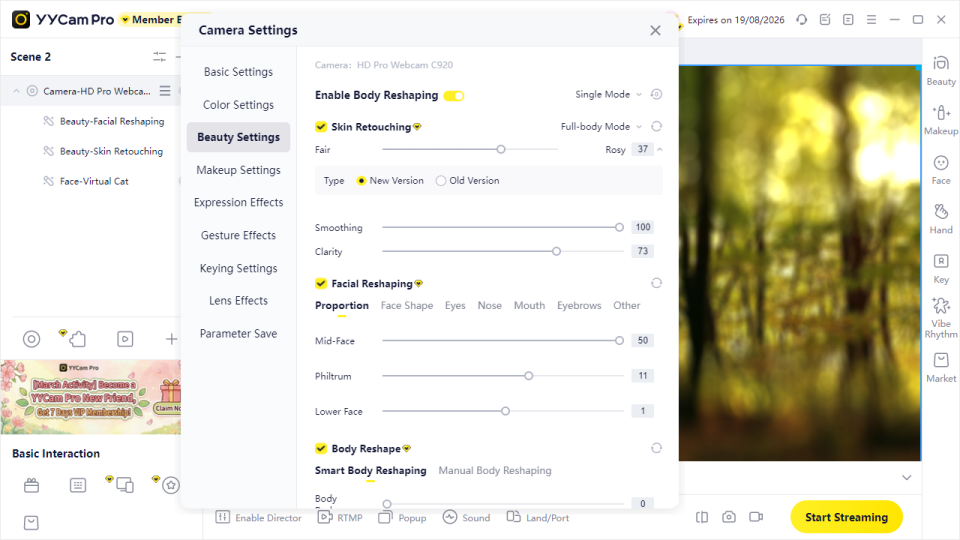
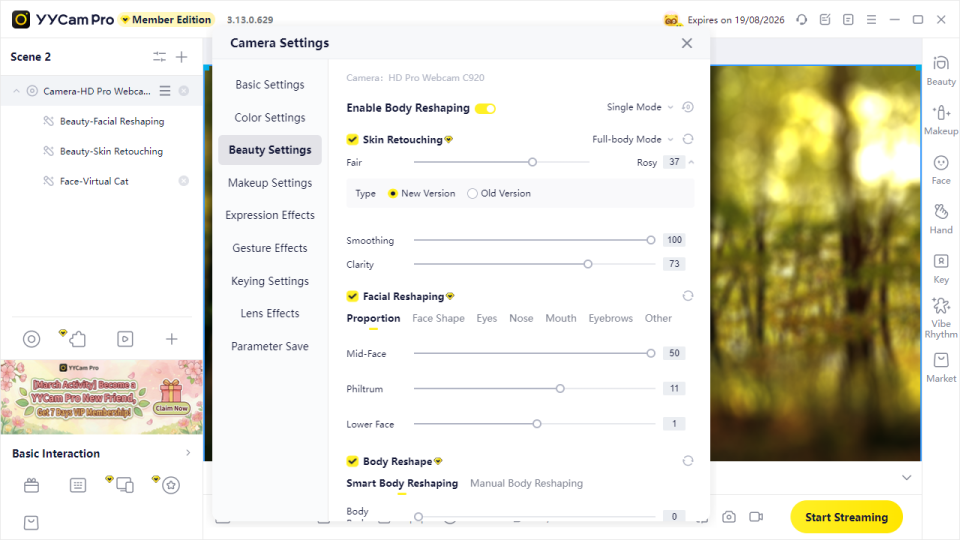
3. Adjust your camera feed and visual settings in YYCam Pro (beauty, filters, effects, etc.).
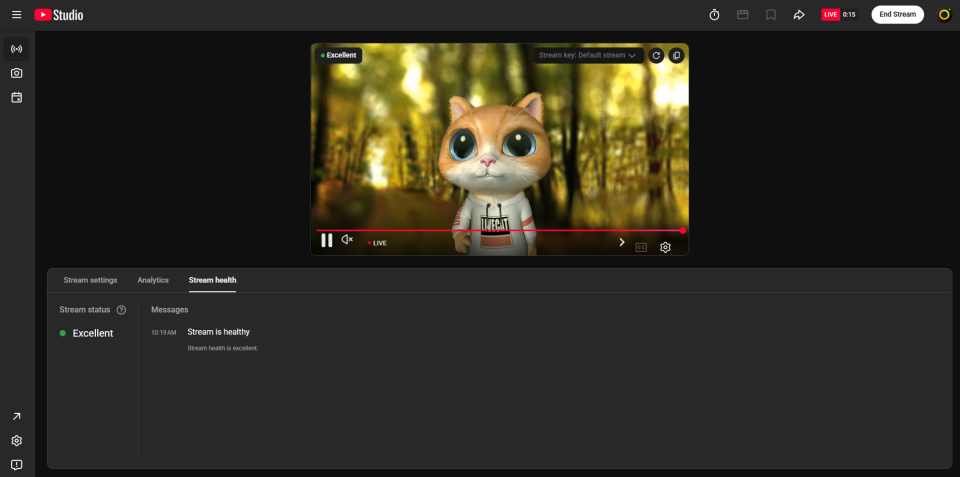
4. Click Start Streaming. After confirming video and audio are working properly in YouTube Studio, you can officially start your live stream.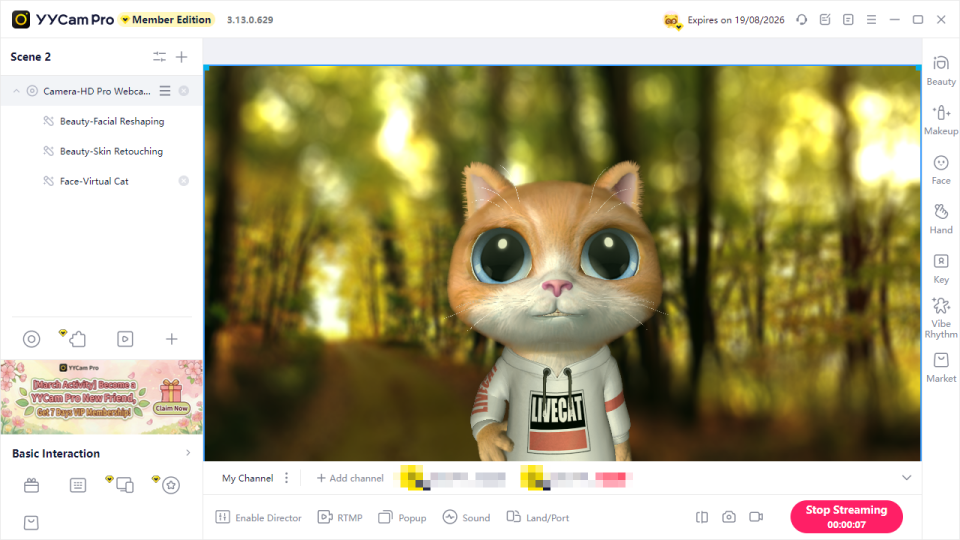
Method 2: Connect to YouTube using Virtual Camera
This method is straightforward and quick to start—ideal for casual sharing, meetings, and lightweight teaching sessions.
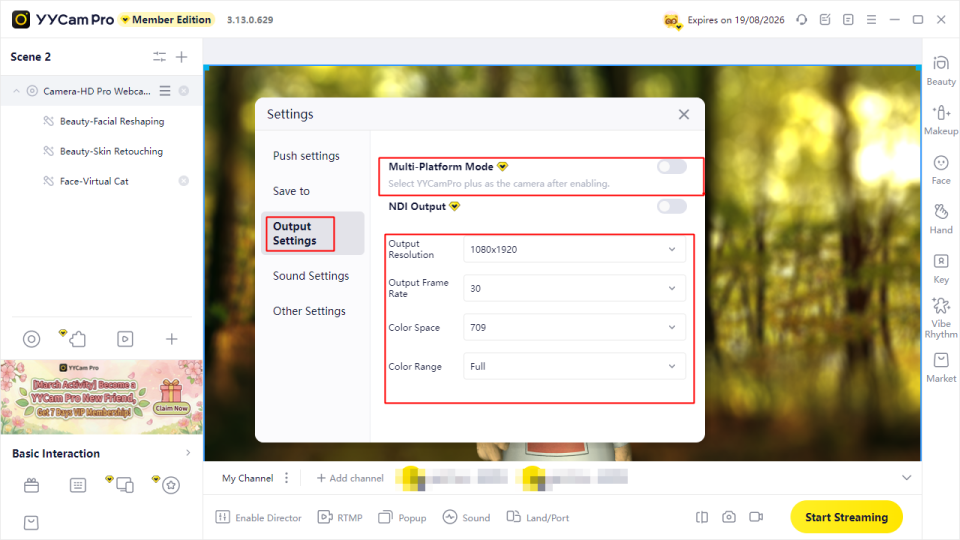
(1) Output a Virtual Camera feed in YYCam Pro
- Open YYCam Pro and set up your live scene (beauty, background, stickers, etc.).
2. Configure output settings. If you want to go live on multiple platforms at the same time, enable Multi-platform Mode.
(2) Select YYCam Pro Virtual Camera in YouTube
- In YouTube Live Control Room, choose Webcam, then set your stream title, description, audience, and other details.
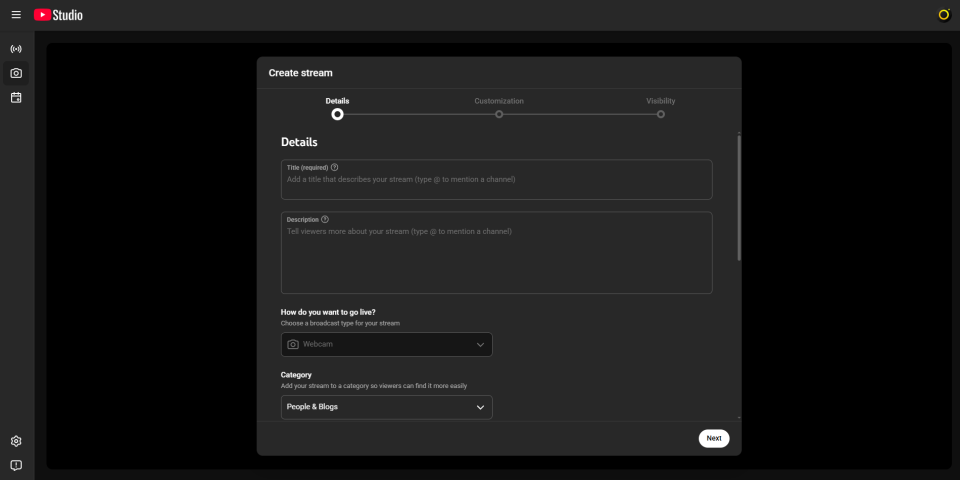
Tip: For first-time testing, set Visibility to Unlisted to avoid being publicly viewed during setup.
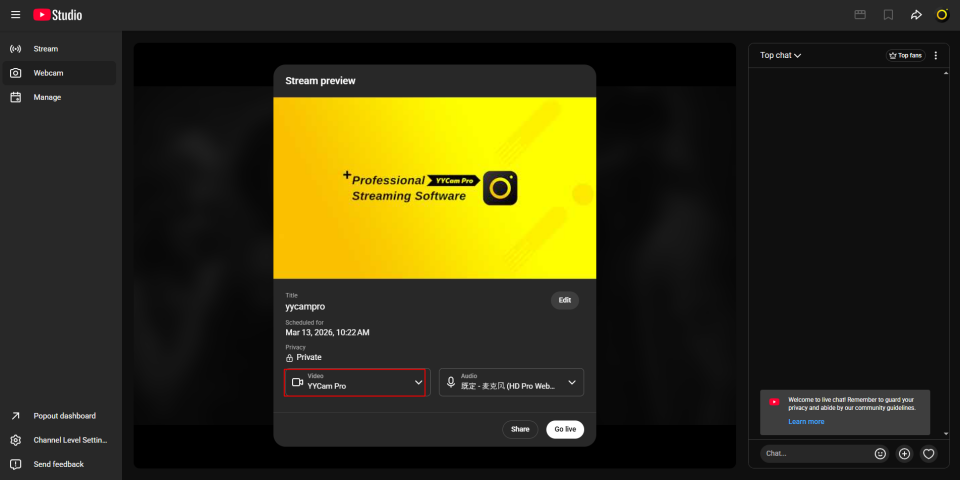
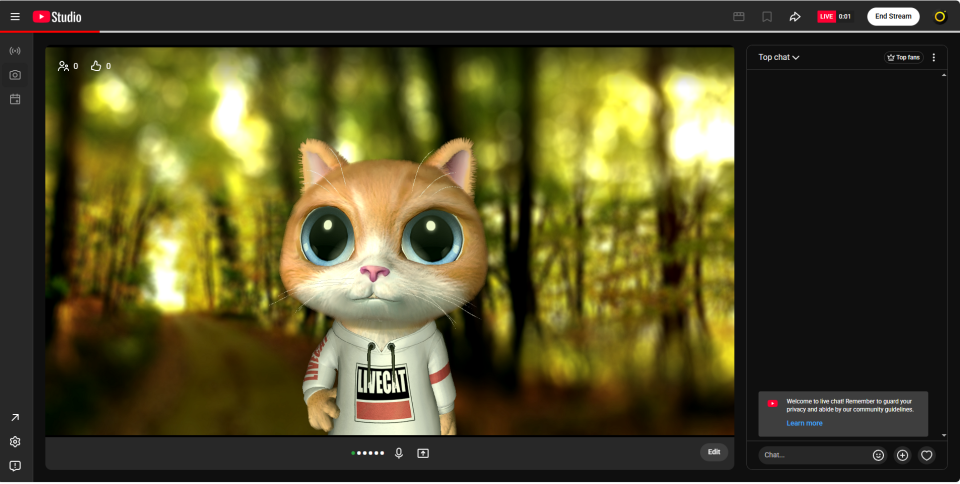
2. On the YouTube live preview page, set the video device to “YYCamPro / YYCamPro plus”. When the YYCam Pro feed appears in the preview and everything looks correct, click Start Live.
3. FAQ
Q1: What should I do if my live stream has high latency?
A: Try lowering the output resolution or frame rate, and check your upload bandwidth and network stability (a wired connection is recommended).
Q2: What if I can’t find the YYCam Pro virtual camera option in YouTube?
A: Ensure you’re using the latest version of YYCam Pro and restart the app. If the issue persists, check your system camera permissions or reconnect your camera device.
Q3: Can I use RTMP and Virtual Camera at the same time?
A: Currently, YYCam Pro does not support enabling both streaming modes at the same time. Please choose one based on your needs.
4. Closing
With the steps above, you now have the complete workflow for going live on YouTube with YYCam Pro. We’ll continue improving the product—bringing you smarter beauty effects, more stable streaming performance, and richer interactive tools to make every live stream more professional and engaging.
If you have any questions or suggestions, feel free to contact us via the YYCam Pro Support Center or our Discord community. Wishing you a smooth stream and happy creating!